

Prepping our Beds and Containers, with Video too
/
Each year we grow tomatoes and peppers in the ground, in containers, and in raised beds. Almost always, the plants grown in-ground out perform the others. What, you ask? In our heavy soils? For most of us here in the Diablo valley, our soils are high in clay. Heavy, sticky, compacted, hard as concrete, cracks-open-in the-summer clay. Frustrating. The upside, though, is that clay typically holds nutrients well and transfers those nutrients to plants well, and when we prep and maintain our beds appropriately, our soils produce great gardens.
Our practices have evolved over the years as we observe our gardens and become more educated about soil. The fact is, there is an entire universe living below our feet. It's an incredibly complex and diverse ecosystem that, when kept healthy, is responsible for producing and nurturing healthy, abundant plant life.
For quite awhile we've advocated double-digging beds. We still do as an initial step in establishing a bed. We used to double dig each spring; however, we are evolving out of it as a yearly practice because it disturbs soil life too much on a continuum. Besides, it's a labor intensive process--a deterrent to actually doing it every spring. BUT, there is no substitute for this method as a way to start a new bed and plant it immediately.
Essentially, double digging is a method of loosening, aerating, and incorporating organic matter into soil to a depth of up to 24". It's a proven method that improves soil tilth, fertility, drainage, water holding capacity, organic matter content and overall soil quality, providing a much improved environment for beneficial soil life, and a superb medium for growing an abundance of great food. What more could an eager gardener want? So, to start, here's a how-to on starting a new garden bed, and how to keep it healthy. Then I'll tell you how we treat raised beds and containers.
In-Ground Beds
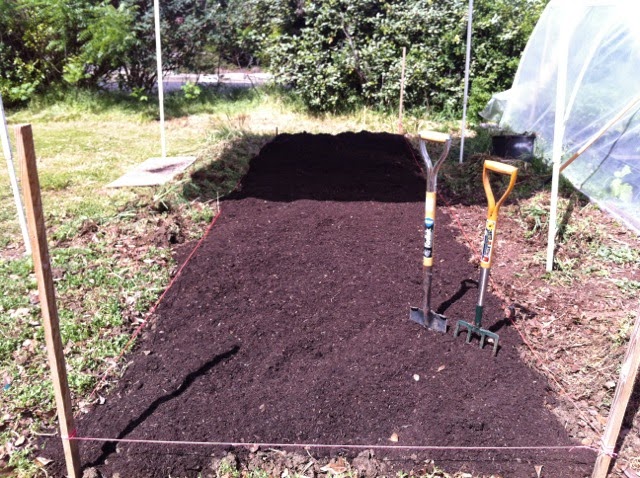
You'll need a digging fork, a spade or shovel, a piece of plywood as wide or wider than your bed (you'll be standing on it), enough compost to cover the bed about 1"-2" thick, plus some compost in reserve--enough to cover the bed 1/2" thick. Also, you want the soil to be evenly moist, not wet. When you get the moisture right, the whole process is WAY easier.
1. Define and mark the bed layout. I like to mark the corners of my new bed with stakes. A 4' or 4 1/2' wide bed allows most people to reach into the center without stepping in the bed. Any length will work, I like mine 10'-20' if space allows.
2. Using the plywood to stand on while in the bed, weed the bed by sinking the digging fork into the soil as far you can and just loosening the root zone. No need to turn the soil, just work the tines up and down a little, then pull the fork out and move it over a little, and sink it again. Do this to the whole bed, then pull the weeds. This step also makes double digging easier.
3. Time to double dig. It's honestly easier to understand if you watch this video, Be patient. Watch it. It gets a little goofy about how to hold your tools and such, but these folks are farming acres this way and are interested in saving their backs. (You'll note that they aren't adding compost during the dig. You DEFINITELY want to add a compost layer as I note in the next paragraph). If you want to cut right to the double dig portion of the video, fast forward to 3:12. It continues on the second video to about 3:15.
Important:
Before you begin digging, spread a 1-2" later of compost over the whole bed. As you are merrily digging away, before you loosen the bottom of each trench, place 1/2" of your reserve compost in the trench.
4. Sprinkle your organic fertilizer nutrients over the bed, and work in to the top 2"-4" of soil. If you're not planting right away, water it in.
5. Plant! Make sure you don't step on the bed now. Use the plywood to stand or kneel on if you want to be in the bed.
6. Mulch mulch mulch! Place compost, straw, dry leaves, or other organic matter several inches deep over your bed. Pull the mulch away from plant stems a little so as not to smother your crop. Mulch will keep your beds moist much longer and as the mulch breaks down, it trickles down into the bed keeping it aerated and loose.
7. Keep the beds covered. Even after your crops are done, keep a mulch layer in place, and/or plant a cover crop. Cover crops send roots down keeping the soil friable, and when cut provide nutrient rich organic matter that you can chop and leave on the bed, or send to the compost pile.
So what happens next year? If we cover crop and keep organic matter on the bed, we have less compaction, and we ideally won't continue the double dig process every year. Which is fine by me. I'd rather spread mulch and seed than dig relentlessly, and the soil life is happier when not disturbed.
Raised beds
We use raised beds for various reasons. It's a popular alternative that reduces the need for digging and with the use of hardware cloth on the bottom can keep the ground varmints from obliterating a garden. But, it's also more expensive and materials intensive. If you opt for raised beds, here's how we prep them.
1. As the beds are built, we loosen the native soil below with a digging fork and add a bit of compost. This improves drainage and encourages roots to populate the soil, rather than acting like a barrier.
2. We fill the bed with a planter mix, not a potting mix or pure compost. Planter mix has some mineral soil in it which is key for transferring nutrients to the plants.
3. As noted in #4-7 in the in-ground prep section above, we work organic nutrients into the top 2"-4" of the bed, then plant, then mulch. Ideally, we keep the beds mulched or cover cropped between planting seasons.
4. Each year, we top off our beds with compost as the planter mix level recedes.
Containers
When growing in containers, we use potting mix. Not planter mix and not soil. Each time we plant a new crop, we top off the potting mix with a blend of potting mix and compost. We work organic nutrients into the upper 2"-4". With container growing, it's challenging to get and keep healthy soil life, and we find that foliar feeding is a great supplement to just relying on nutrients in the potting mix. Every 3 years or so, the containers get cleaned out and filled with new potting mix, as the old mix has deteriorated. I wrote a more detailed post about container planting for tomatoes some time back, and you can read that here...
However you choose to garden, I'm happy you're doing it. The world is a better place with gardens and gardeners in it.