Gardens and Drought - 4 Steps to Reducing Water Use

With our governor’s announcement that water rationing is now an official reality and soon-to-be mandatory, I thought I’d review some of the things we can all do in our gardens to conserve water and still grow lots of great food. 

I 've written about this before, but given our dire water supply and the fact that it's planting season, I thought it would be a good refresher for me, and hopefully for you too!

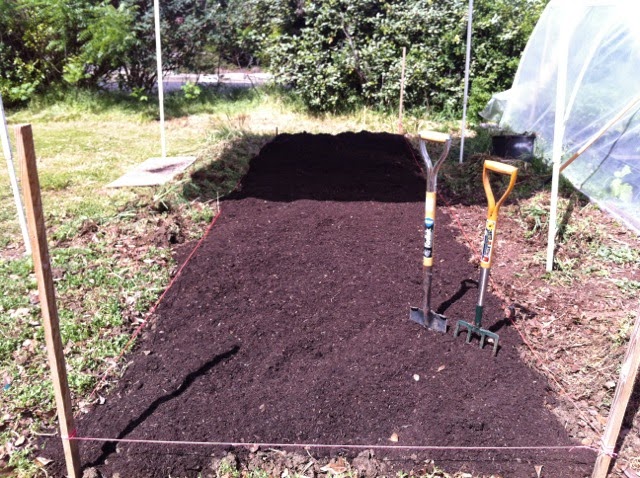
  1. Amend your soil. Work lots of compost as deeply as you can into your beds—up to 24” deep. Loose soil with organic matter encourages bigger, deeper root systems that can find moisture and nutrients. Your plants will be healthier and tastier too!

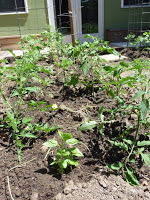
  2. Plant intensively and with diversity. Leaving lots of space between plants makes for lots of exposed areas that dry out and compact quickly. While you don’t want to crowd your plants to the point where you lose production, you can tuck different plants into bare spaces. For instance, if you plant your tomatoes 24” apart, you can tuck some herbs, peppers, and beneficial flowers in between. It’s pretty and all the plants tend to do better. The soil stays covered (which slows evaporation) and the plants tend to take care of each other.

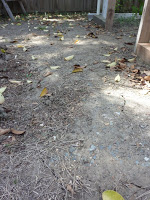
  3. Mulch! This will drastically reduce the amount of water your beds need. Once planted, mulch your garden beds with several inches of organic matter. You can use compost, straw, fir bark, dead leaves or wood chips to layer over your beds. You will be amazed how moist the soil below will stay. It’s like an insulation layer. It also tempers heat and cold.

  4. Water judiciously. The fact is, overwatering is a very common error gardeners make. We want so badly to take good care of our plants, and watering seems like such a kind and nurturing thing to do! We tend to water when we feel it’s hot, and when the ground looks dry. Just because it looks dry on the surface though, doesn’t mean it’s dry 6” down. Get in the habit of poking down into the soil periodically and feeling with your fingers or hand. If it’s moist, you shouldn't need to water.

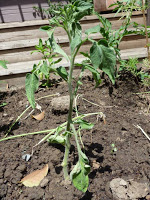
A note about tomato plants—they will sometimes wilt some during the day when the sun is intense or it’s particularly hot.  Don’t grab the hose yet though! Our first reaction is to water them, but that’s probably not what they need.  If the plant perks up again as the sun recedes and temperatures drop in the evening, then it’s not a watering issue.  They just responded to the light and heat by drooping some.  They will be fine.  Planting intensively will help, as plants help shade and protect other plants.

Now, I gotta go plant!

Prepping our Beds and Containers, with Video too

Each year we grow tomatoes and peppers in the ground, in containers, and in raised beds. Almost always, the plants grown in-ground out perform the others. What, you ask? In our heavy soils? For most of us here in the Diablo valley, our soils are high in clay.  Heavy, sticky, compacted, hard as concrete, cracks-open-in the-summer clay. Frustrating. The upside, though, is that clay typically holds nutrients well and transfers those nutrients to plants well, and when we prep and maintain our beds appropriately,  our soils produce great gardens.

Our practices have evolved over the years as we observe our gardens and become more educated about soil. The fact is, there is an entire universe living below our feet. It's an incredibly complex and diverse ecosystem that, when kept healthy, is responsible for producing and nurturing healthy, abundant plant life.

For quite awhile we've advocated double-digging beds. We still do as an initial step in establishing a bed. We used to double dig each spring; however, we are evolving out of it as a yearly practice because it disturbs soil life too much on a continuum. Besides, it's a labor intensive process--a deterrent to actually doing it every spring. BUT, there is no substitute for this method as a way to start a new bed and plant it immediately.

Essentially, double digging is a method of loosening, aerating, and incorporating  organic matter into soil to a depth of up to 24". It's a proven method that improves soil tilth, fertility, drainage, water holding capacity, organic matter content and overall soil quality, providing a much improved environment for beneficial soil life, and a superb medium for growing an abundance of great food. What more could an eager gardener want? So, to start, here's a how-to on starting a new garden bed, and how to keep it healthy. Then I'll tell you how we treat raised beds and containers.

In-Ground Beds

You'll need a digging fork, a spade or shovel, a piece of plywood as wide or wider than your bed (you'll be standing on it), enough compost to cover the bed about 1"-2" thick, plus some compost in reserve--enough to cover the bed 1/2" thick. Also, you want the soil to be evenly moist, not wet.  When you get the moisture right, the whole process is WAY easier.

1. Define and mark the bed layout. I like to mark the corners of my new bed with stakes. A 4' or 4 1/2' wide bed allows most people to reach into the center without stepping in the bed. Any length will work, I like mine 10'-20' if space allows.

2. Using the plywood to stand on while in the bed, weed the bed by sinking the digging fork into the soil as far you can and just loosening the root zone. No need to turn the soil, just work the tines up and down a little, then pull the fork out and move it over a little, and sink it again. Do this to the whole bed, then pull the weeds. This step also makes double digging easier.

3. Time to double dig. It's honestly easier to understand if you watch this video, Be patient. Watch it. It gets a little goofy about how to hold your tools and such, but these folks are farming acres this way and are interested in saving their backs. (You'll note that they aren't adding compost during the dig. You DEFINITELY want to add a compost layer as I note in the next paragraph).  If you want to cut right to the double dig portion of the video, fast forward to 3:12.  It continues on the second video to about 3:15.

Important:
Before you begin digging, spread a 1-2" later of compost over the whole bed. As you are merrily digging away, before you loosen the bottom of each trench,  place 1/2" of your reserve compost in the trench.

4. Sprinkle your organic fertilizer nutrients over the bed, and work in to the top 2"-4" of soil. If you're not planting right away, water it in.

5. Plant! Make sure you don't step on the bed now. Use the plywood to stand or kneel on if you want to be in the bed.

6. Mulch mulch mulch! Place compost, straw, dry leaves, or other organic matter several inches deep over your bed. Pull the mulch away from plant stems a little so as not to smother your crop. Mulch will keep your beds moist much longer and as the mulch breaks down, it trickles down into the bed keeping it aerated and loose.

7.  Keep the beds covered. Even after your crops are done, keep a mulch layer in place, and/or plant a cover crop. Cover crops send roots down keeping the soil friable, and when cut provide nutrient rich organic matter that you can chop and leave on the bed, or send to the compost pile.

So what happens next year? If we cover crop and keep organic matter on the bed, we have less compaction, and we ideally won't continue the double dig process every year. Which is fine by me. I'd rather spread mulch and seed than dig relentlessly, and the soil life is happier when not disturbed.

Raised beds

We use raised beds for various reasons. It's a popular alternative that reduces the need for digging and with the use of hardware cloth on the bottom can keep the ground varmints from obliterating a garden. But, it's also more expensive and materials intensive. If you opt for raised beds, here's how we prep them.

1. As the beds are built, we loosen the native soil below with a digging fork and add a bit of compost. This improves drainage and encourages roots to populate the soil, rather than acting like a barrier.

2. We fill the bed with a planter mix, not a potting mix or pure compost. Planter mix has some mineral soil in it which is key for transferring nutrients to the plants.

3. As noted in #4-7 in the in-ground prep section above, we work organic nutrients into the top 2"-4" of the bed, then plant, then mulch. Ideally, we keep the beds mulched or cover cropped between planting seasons.

4. Each year, we top off our beds with compost as the planter mix level recedes.

Containers

When growing in containers, we use potting mix. Not planter mix and not soil.  Each time we plant a new crop, we top off the potting mix with a blend of potting mix and compost. We work organic nutrients into the upper 2"-4". With container growing, it's challenging to get and keep healthy soil life, and we find that foliar feeding is a great supplement to just relying on nutrients in the potting mix. Every 3 years or so, the containers get cleaned out and filled with new potting mix, as the old mix has deteriorated. I wrote a more detailed post about container planting for tomatoes some time back, and you can read that here...

However you choose to garden, I'm happy you're doing it. The world is a better place with gardens and gardeners in it.

Water, Lack of Water, and the Edible Garden

...posted by Kelley


As I write this, it's 97 degrees outside and I'm thinking about our water supply, or lack thereof. Many gardeners questioned whether it's a good idea to grow this year, but I must admit that I didn't flinch. There was no question for me that I would continue to grow food. It has, however, made me hyper aware of how I use water, and what steps I can take to reduce my usage in the garden.  Here's 5 steps I'll take this year.

1. Prep Your Beds Well.  This is SO important.  I double dig my beds, which is initially a pain in the a**, but it makes a world of difference. Why? Many reasons, but simply put, plant roots need air. The farther down from the surface you can loosen and amend the soil and provide air, the farther down plant roots can go after water and nutrients. The deeper the roots, the less water needed at the surface. I also space my beds close together. Narrow walkways mean less hot, dry, exposed, compacted ground. 

2. Plant Intensively.  In a double dug bed, or in raised beds and containers, you can space plants quite close together. As the plants grow and mature, they help shade each other and the soil surface, slowing evaporation. Water vapor also stays in and under the plant canopy longer. Additionally, planting a diverse group of plants together enhances the health of each, especially if you include flowering plants and those that tend to have different root depths and similar water requirements. 
  
3. Install and maintain a drip system.  Not only does it save water, but it makes life a lot easier. I set up my beds with dripper line spaced quite closely. I want the dripper system to wet the entire bed, not just the base of each plant. That way I can plant intensively and not worry about whether there is a dripper exactly at the base of each plant, and next season I can plant again without rearranging the system. I also believe that an evenly moist bed supports soil life and nutrient supply better than a bed with wet and dry spots.

4. Mulch.  Lots and lots of it. 3-5" of it over the whole bed and over the drip system. Just as planting intensively slows evaporation, so does mulch. Compost, straw, mini bark or fir bark, all work fine. I don't suggest wood chips, because as they break down, they use nitrogen, making it less available to your plants. Bark doesn't do this, wood does. I like compost because it's the same material I double dig my beds with and it will only make the beds better. It also looks better to me than straw. Make sure your drip system is working well before you mulch and pull the mulch away from plant stems a little.  

5. Stop Watering So Much!  Tomatoes, peppers, most herbs and well chosen beneficials don't need an abundance of water. If fact, too much water makes tomatoes taste like...water. Additionally, a plant that gets watered frequently has no need to send roots down deep. In the August heat, tomato and pepper plants in my double dug beds get water every 10-14 days. That's it. With deep mulch I'm sure I can stretch it farther than that. My squashes, beans, cucumbers and melons get water every 7 days or so. I'm curious to see how far I push it this year.

I wish us all an abundant and drought friendly gardening year!

Planting Q&A with Kelley and Arti

While you all have been busy gardening since our last posting, we've been away catching up on our separate interests. That included a tour of Eastern Sierra/Great Basin native plants (e.g., native claret cup cactus at right).

However, despite the vacations, Kelley still managed to amend her good ol' Contra Costa clay just in time for planting by June 1. It was sort of an homage to that classic "Faster, Kelley! Dig! Dig!". Arti "interviewed" her and she has this advice to share:

Arti's Question: You have a backyard that had grass and other stuff growing on it at one time -- why did you amend the soil before planting?
Kelley's Answer: There are 2 main reasons I had to amend my soil.

First, the grass that was once there is long gone, especially since we ran over it repeatedly with heavy equipment when we remodeled the house. That said, the type of suburban grass that was most likely there has shallow roots. Therefore, it never needed to reach deep into the native clay. The tomatoes and other plants I've put in have deeper roots.

The clay is basically impenetrable -- heavy, gluey glop in winter, and brick-hard in summer. Remember what all those Spanish missions were made of? So, my soil had to be loosened up and material added to keep it from returning to its original dense, airless state. This picture sums it up: look at the flat, packed and cracked character of the unamended part of my yard.

Second, a simple soil-testing kits from the hardware store revealed that the soil was an empty plate. Now, there may have been some nutrients in it, but they were "locked up". This means that nutrients may be present, but the plant does not have the chemical or mechanical processes to use it. For example, this winter we had a good amount of rain, which contains lots of nitrogen that plants love.

However, that nitrogen is in an organic form that plants cannot use. Bacteria found in soils convert organic forms of nitrogen to inorganic forms that the plant can use. Nitrogen is taken up by plant roots and combined into organic substances in the plant, such as enzymes, proteins and chlorophyll. Thus, regardless of whether there might have been any nutrients in the soil, it was essentially an empty plate for the plants.

To fix this problem, I double dug several planting beds and added the following for every square yard of clay that was dug up:

- 70% Compost, for general enrichment, aeration
- 10% Bone meal, as a phosphorus boost for fruit production
- 10% Kelp meal, for potassium and trace minerals
- 10% Worm castings, for enrichment

Q: After amending the soil, did you just plop the plants in?
A: Tomatoes being the heavy feeders they are, I added more goodies to the holes in each new fluffy bed (see right) to increase the possibilities for a succesful crop. To each 12" deep hole I added:

- 1 fishead for a calcium boost, which guards against blossom end rot. I got mine at Ranch 99 for $.79/lb, but any Asian-style market is likely to have them;
- 3-4 crushed eggshells, also for calcium, that I saved over the winter;
- 1 handful of bone meal (from Navlet's) which is rich in phosphorus and critical to fruit production;
- 1 modest handful of worm castings, also from Navlet's, for a delicious first feed;
- the recommended dose of mycorrhizae from Bountiful Gardens, where you can read about the amazing things this product does.

Then, after the plant was lowered into the hole and the soil carefully, gently backfilled, I topped it off with nice drink of Dr. Earth's 5-7-4 plant food.

Q: Any other interesting things you found out in the process?
A: Yes, WAY!

Remember how we always say to rotate tomato crops? Well, when I dug up last year's bed, I found several fat, gross hornworm pupae, just waiting to emerge into their adult stage as a hawk/hummingbird moth. Sure am glad I did not use that bed again!

I also discovered that my yard is not all the same clay, nor even all clay. I found brown, red, green, and black clay...not sure what it means, but food for thought. Then, in a thin band around the inside of my fence, I found nice soil with perlite in it and all. This was obviously the remnant of what were perimeter plantings when this was a traditional suburban lawn.


Finally, I noticed that one of our tomato varieties, the White, likes to pretend it has leaf curl -- see this picture at right. So, if you are one of our customers who bought this variety, do not panic.