Full Speed Ahead!

Posted by Kelley...

Strap on the seat belt and pull it tight.  Keep your arms and legs inside and hold on.  Time will warp.  That's what the last 6 weeks have felt like.  It peaked today as we wrapped up our final tasks for the Urban Farm Expo tomorrow.  Time has found a speed that I've never seen.  I'm not moving faster, but the days are really really short!

It's been quite a ride, and we're about to see what our weeks of hard work and planning will produce.  We hope to see a lot of curious, happy, excited gardeners and soon-to-be gardeners enjoying the event, the workshops, the gardens, and each other.

For a map to the ranch, complete information, and list of classes and exhibitors, go to Urban Farm Expo.  

We have some great workshops and presentations.  Kathy Echols will lead a workshop on propagation.  If you know of Kathy, you know how amazing she is.  Chris Shein will talk about permaculture and his newly published book on the subject.  Another very knowledgable person.  We'll have workshops on garden irrigation, biodymamics, chickens, bees, garden planning, and much more.

I hope to see many friendly faces there.  Wish us good success.

Coming Out of Hibernation

Posted by Kelley

It snuck up again. I swear every year that I'll be well prepared. Maybe it's that we still haven't had our rainy season. Maybe it's just like all those grown-ups said when I was a kid...time flies by faster and faster as we get older.  Well this last one was a blur, and here we are in March.  Daylight savings time is days away!  
Potting benches almost finished
We have come out of hibernation.  I built some potting benches to replace our old one--which was an old steel door propped up on garbage cans.  I put a canopy over them too so we don't have to pot up in the rain.  Our seedlings are looking great and are growing like mad.  Most are screaming to get potted up and into the greenhouse.  We still have some seed to start, but most of the tomatoes and peppers have germinated.  

We have some new varieties to add to the mix, and I'm working on getting them posted.  Tune in again shortly!


"Oh my, all those tomatoes" Part 1

You believe that you are raising too many tomato plants.  You even fear, a la Garrison Keillor, you'll resort to leaving anonymous bags of fruit in people's unlocked cars.  I have many suggestions for this non-predicament, and will start sharing them throughout the season.

Suggestion 1 - Fresh tomatoes in winter  All that green fruit remaining on your vines when the weather turns cold can still be ripened -- inside your house!  They won't taste like those that develop in-season on the vine.  But they will be better and cheaper than anything you buy after Thanksgiving.  Here are several nice 'n lazy methods (my preferred style) for ripening tomatoes at home.

Tomatoes ripening, Nov. 2011
a.  Put up to 2 layers of unripened tomatoes in a cardboard box with crumpled newspaper.  Leave the box in a dark, dry place (like the back of your closet).  Check weekly to see which are ready to eat; remove any that have gone bad.

b. If you have counter space, set them out in a bowl.  No need to put them in the sun.

c. Put the green tomatoes in a paper bag with a ripe apple and check daily.  Apples are efficient emitters of ethylene gas which accelerates ripening.

Suggestion 2 - Ketchup  One of the requirements for becoming a U.S. citizen is a lust for potatoes (especially fries...duh) with ketchup.  But the bottled red stuff is insipid compared to what you can make. I never write anything down, so I borrowed a close-enough recipe from Susy Morris' beautiful blog about organic gardening in Ohio.

Regular ol' Tomato Ketchup (but better)

1 cinnamon stick
1 bay leaf
5 whole cloves
5 cardamom pods (crushed) - Susy used 1/2 t. ground cardamom
1 star anise
10 black pepper corns
28 oz. whole tomatoes - Susy roasts hers; I don't bother
1 large yellow onion, quartered
2 T olive oil
2 teaspoons kosher salt
1/3 cup packed brown sugar - I use about 3 Tablespoons maple syrup
1/2 cup organic white balsamic vinegar
1 teaspoon hungarian paprika - Susy and I use smoked paprika, i.e., pimenton
freshly ground black pepper

1. Using a piece of cheesecloth or empty tea bag, tie the cinnamon, bay, cloves, anise, and peppercorns into a bundle.  Set aside.
2. Put tomatoes into a food processor or blender (or put roasted tomatoes thru food mill).  Puree till totally smooth, and set aside all but 1/4 cup.  To the 1/4 cup, add the onion and puree together.
3. In a large dutch oven (this will splatter so use a large tall pot), heat the oil over medium heat.  Add the onion puree and salt and stir well.  Cook for 8-10 minutes, letting the puree reduce and lightly brown.  Add the tomato puree, maple syrup, vinegar, and spice bundle, turn heat to low simmer and reduce for about 20-25 minutes uncovered, with an occasional stir (cooking time is reduced if using roasted tomatoes).  When it's done reducing, it should be a bit less thick than commercial ketchup.  Stir in paprika; season with salt and pepper to taste.
4. Let ketchup cool and remove spice bundle.  Pour into a jar and chill overnight, or at least 6 hours.  Will store in fridge for up to 2 months (if i feel it is in danger of passing that time frame, I freeze some).

----- Arti

Planting Basics

I am going to cheat and re-publish parts of posts from 2010, partly because they are basic, and partly because I think I did an amazing job being succinct (a personal best).
-----------------------------------
Here are 3 basic things to help grow a successful crop of tomatoes.

1. Plant deep - As we all know, root development is key to the life of almost all plants.  And all those hairs on the stem of the tomato plant are actually potential roots, ready to develop and suck up nutrients. So, to take advantage of the tomato's root-iful characteristics, lower at least 50% of the green part our plants into its planting hole.  The hole, by the way, should be approximately the size of a half-wine barrel: 18 inches deep, 2 feet in diameter.

Be sure to fill that hole with good stuff.  Tomatoes like well-drained soil -- they will suffocate in our lovely Contra Costa clay.  To get that result the easy way, fill the hole with a good, balanced mix like Navlet's Planting Mix.  Then, give the hole with the plant in it a great, big initial drink.  Fill the hole basically to overflowing so that the entire root ball and contents of the hole are wetted.

We also recommend the following for the initial planting.  These additions should be mixed evenly into the hole, except for the fish head:

1 fish head at the bottom of the hole for nitrogen, phosphorus and calcium, and for a big boost to the wonderful soil life that digest the fish head and make nutrients available to the plants.  I got mine at Ranch 99 for $.79/lb, but any fish monger or Asian-style market is likely to have them.  If the heads are big, like salmon, it's perfectly OK to cut them in half;
3-4 crushed eggshells, for calcium, that I saved over the winter;
1 handful of bone meal which is rich in phosphorus and critical to fruit production;
1 modest handful of worm castings for a delicious first feed;
the recommended dose of mycorrhizae from Bountiful Gardens, where you can read about the amazing things this product does.

I know this may seem excessive, but given the resources that you are going to give the plant in terms of time and water, do yourself a favor and make sure to give the plants the best start.

2. Feed well - tomatoes need to be fed about once a month after planting. There are many and complicated recipes. However, a balanced organic fertilizer that emphasizes phosphorus is a good choice, e.g., a 4-6-4. Phosphorus, the second number in all fertilizer forumulas, is key for fruit production. Many good organic fertilizers can be purchased at your local nursery. We got our plants off to their great start with combinations of products from Dr. Earth, Whitney Farms (currently, a Scotts company), and E.B. Stone.

3. I'll have another sip - be consistent in watering tomatoes after planting to avoid "bingeing". It's not good to drown them one day and follow up with a week of neglect. You can easily monitor the plants' needs by sticking your finger down a couple of inches into the soil. If it's dry, they may need a drink, but maybe not: tomatoes like a bit of drying, even to the point of mild wilting. Mulch also helps -- it slows down moisture loss and keeps roots cooler by providing shade for the soil. Put the mulch up to about 6 inches from the stem; that way, certain pests won't be able to stage a sneak attack under the cover of the mulch.

One last thing: rotate your tomato sites year over year for disease control. Many of the most common tomato pests live in the soil, but you can usually outrun 'em by planting in different locations.

----- Arti

Container Planting

We get a lot of inquiries about growing tomatoes in containers. While neither of us are experts, we are opinionated, so I get to give you my 2 cents.  If you're a seasoned container gardener with a solid history of success, then I probably need your opinions more than you need mine.  If you have spotty success or are new at this, I hope this helps.

The Container:  Most tomato varieties want a large container.  15 gallons minimum.  A tall pot is better than a short wide one.  Don't skimp on the size of container, those roots need room!  There must be a hole in the bottom for water drainage.  I don't like those saucers that catch water under the pot.  What's the point of a drainage hole if the pot is going to sit in a pool of water?  Also remember that pots, especially dark plastic ones, can absorb a lot of heat.  That's a plus in the spring when temperatures are cooler, but bad when it gets hot and the sun is intense.  Draping shadecloth around the container will help.  Thick terracotta pots don't seem to have this problem.

The "Soil":  Container growing is not like growing in the ground. Do not use garden soil, topsoil, or that pile of dirt in the corner of your yard. The pot serves up some challenges, and using soil makes those problems worse.  Don't use pure compost either.  Use potting mix.  A good one.  Why?  I could write a whole missive about this and tell you greenhouse horror stories involving 1000 tomato seedlings, but that's for another time. So, what's a "good" mix?  Good mixes have structure, hold a lot of air and some water, but drain really well.  Typical mixes in our area contain partially composted fir bark or bark fines (sometimes rice hulls), peat moss or coir, perlite, and some nutrients and ph adjusters.  It's hard to recommend a brand, because I've had great results some years and bad ones the next with the same brand. Cynthia Sandberg, who farms for Michelin rated Manresa restaurant, swears by Gardner & Bloom potting soil.  That's the best I can do for a brand recommendation.  If you open a bag of potting mix and most of the contents are very fine (less than 1/16"), you don't have a good mix.  It won't have enough structure, won't drain well, won't hold air, and will "collapse" or compact in short order.  All bad news.

Planting:  Tomato plants benefit from planting deeply.  Very deeply.  You want to bury much of the stem,  I'd say halfway up the stem is good general rule.  Clip off all the leaves below that halfway point just before you plant.  The part of the stem that's buried will grow roots, which will produce a healthy productive plant.  Before you place the plant down into the container, gently pull the rootball out at the sides, so it loses the seedling container shape and encourages the roots to grow outward.  Once planted, water thoroughly.  You want the potting mix and the rootball to get evenly moist.  Just because water drains out the bottom doesn't mean everything is evenly moist.  Water once, come back in 5 or 10 minutes and water again, then wait another few minutes and water a third time.

Nutrients:  If you're using an organic potting mix, or one that does not contain a CRF (control release fertilizer), your greedy, hungry tomato plant will use up all the available nutrients in 4-6 weeks.  I like to mix an organic dry vegetable food (such as Dr. Earth, Whitney Farms, Espoma, etc) into the upper 2 - 4" of potting mix at planting time with a little extra bat guano or alfalfa meal, used sparingly. Still, at 4-6 weeks, you'll need to start feeding again. Then I'd switch to an organic liquid food, and feed weakly weekly--a weak solution once a week, like 1/2 the strength suggested on the label.

Watering:  Don't kill 'em with kindness.  Tomato plants don't like to be wet all the time.  They prefer to go just a little on the dry side (slightly moist), and then be watered well.  Frequency will change over the season.  Hot or cool temperatures, longer days, wind, sun exposure, your potting mix and the size of the plant all influence frequency.  You may only need to water once a week in spring, and then once a day in summer when it's hot and the plant is larger.  You'll need to get a feel for that.  Don't be shy about sticking a finger down into the soil.  Just because the top looks dry doesn't mean it's dry 6 or 8 inches down.

Staking:  Most varieties need to be staked or caged, even in a pot. Unless you're growing a determinate variety or a specifically compact variety, don't bother with those crappy little wire cages. They are a waste of money and resources. One day you'll come out for a visit with your tomato friend and it will have pulled that thing out of the soil and be wearing it like a hat. Then it will fall over. You'll then have to figure out how to extract the plant from the cage without destroying both. Does it sound like I've been there before? Go to your local home improvement store and find the aisle with sacks of concrete. You'll see remesh mats--4' x 7' welded wire mesh sheets made for reinforcing concrete. Buy one. Roll it into a tube shape and wire it together so it will stay in the tube shape. Now you have a functioning tomato cage. Slip it over the plant, tuck it's arms and legs inside and secure the cage to the container with a long stake driven into the soil and wired to the cage. If you don't stake the cage down your tomato friend will one day yank it out and try to heave it across the yard. Continue to tuck it's arms and legs inside the cage as it grows.

A Note about Varieties:  I think people assume that they must grow cherry varieties if growing in containers, but it's not the size of the fruit that matters as much as the growth habit of the plant. We offer a couple of cherry varieties that I swear would knock a 15 gallon container over, drag it around the yard and then become very unhappy. That said, I don't recommend most of the big, late season beefsteak varieties because the chances of getting only 2 or 3 tomatoes all season are just too high. If you're growing more than a couple of plants, the risk may be worth it. Many of the early and mid season varieties, and those that are prolific producers will do well for most people.

A Note on Drainage:  Here's the part where I feed you more information than you wanted. One major problem with container growing is drainage. Even with a good potting mix you are likely to get water that just won't drain out of the pot, and it pools in the bottom making a soupy, airless layer that roots don't like. This is "perched" water. We all used to think that putting gravel or sand or pot shards in the bottom of our pots would eliminate perched water, but it turns out that physics doesn't work that way. I won't bore you with the details here (I'll bore you with it in another post), but gravel in the bottom of a pot only takes up space, and the perched water will still stick in the bottom layer of potting mix above the gravel. Now, sometimes plant roots will colonize that zone before it gets bad and use that water, but many times not. So what's the solution? Before you fill your container with soil, take a mop string, or absorbent length of rope and coil it around the bottom of the inside of the pot, then thread one end through the drainage hole and let it dangle a couple of inches below the bottom. Elevate the pot with pot feet or something that will keep the pot from sitting on the ground.  Now fill your container with potting mix. The mop string/rope acts as a wick, drawing excess moisture down the string and out of the pot. It's the same idea as sticking the corner of a paper towel in a cup of water and watching the water get pulled into the paper towel. Are you asleep yet?

Wow, that was more like 10 cents worth of opinion. How about you? What works for you? Please share!

...Kelley

Playing Hookey

We couldn't help ourselves.  Sure, there was lots of work to do around our little nursery, but the mountain was calling.

View from Wall Point
It's that magical time in spring, when the grassland turns brilliant green.  The oaks are leafing out, new growth is tender and bright and spring blooms are starting.  So it just made sense to shirk all responsibility and get a much needed fix of Mt. Diablo.

Lupine
Good for the soul and the senses.

Big Leaf Maple in bloom
Work?  There's always tomorrow.

...Kelley


Kelley's Garden Review...Wrapping it Up

Charentais Melon
The rest of last summer’s garden…

Fava Beans beans were good as always.  Since they like cooler weather it was no surprise.  Favas are great for so many things.  They provide lots of healthy green foliage over the cold season, are a nitrogen fixer and good cover crop, they bloom early and entice pollinators and beneficial insects, and they provide loads of delicious beans. 

In general, my summer crops were sluggish, smaller, and produced less (big surprise, huh?).  Snap beans, soybeans, winter squash, melons, cucumbers all fell into this pattern.  Of course, while the plants were slow and late, the powdery mildew came right on time.  Ughhhh.  It fizzled out too though, which surprised me.

The star of summer for me was Charentais melon.  OMG!  The most fragrant, beautiful intoxicating melon ever. I must grow these again. The fruit was a stunning slate blue/green while growing, beautiful soft orange tones when ripe, and had the most intoxicating sweet/floral aroma that filled my whole house while perched in my fruit bowl.  They even felt great cradled in my hands.  The flesh was bright orange and the flavor was fantastic.  This was my first time growing it, and I have high hopes for future summers.

Another first for me was Garbanzo beans.  They were quite small, attractive plants, and while they are a warm season bean, many of my plants are surviving the winter.  Something found them to be the perfect place to lay eggs though, because I found small holes in the pods that larva drilled, climbed in and fed on the young beans undisturbed by the world outside.  I lost a good 25-30% of the beans.  Not sure I’ll try it again--the pods were a pain to harvest, but the fresh beans were really tasty.

My summer squash went something like this;  Grow, blossom, set fruit, drop fruit.  Blossom again, set fruit, drop fruit.  Bloom again, grow harvestable fruit, then shut down in July and shed almost all growth.  Sleep.  Wake up, grow, blossom, set fruit, harvest, go back to sleep.  Wake up again, repeat until frost. 

Peppers were a struggle.  The plants that didn't succumb to the snails resisted growing, then resisted producing, then resisted ripening.  If anything beat out the head scratching harvest season that tomatoes were…well…peppers were it.  They were ripening in October, November, even December.  I must say though, that Jimmy Nardello produced fairly well.  Love, love, love these sweet crunchy peppers!

Ground Cherries produced like crazy, as usual.  I’m convinced these will grow and produce nearly anywhere.  I like the unusual flavor of these, and they will hold in the husk for a long long time. 

I always plant flowers in and around my veggie beds, for beauty and diversity, and to foster the “good” bug population.  Many didn’t survive, or didn’t bloom.  I planted cosmos all over and got - none.  Cornflowers - a few.  Four O Clocks – two.  I finally got Tithonia (my favorite!) close to fall.  They usually grow fast and bloom like mad all summer.

Once fall came, so did the cabbage moths. A banner year.  A great year for observing,  I did learn to spot their eggs.  They are so tiny but yellow, and amazingly enough are easier to see than a fully engorged green cabbage worm.  I had planted a bunch of broccoli, cauliflower, cabbages and kale, so I was pretty freaked out about the sheer number of egg laying moths on my tender crops, but to my surprise I had relatively little damage.  Nature is a beautiful thing when we let her have command.  Why in the world do we think we can do a better job of managing pests?  Except for snails maybe.  Little bastards.

That’s it.  I’m done looking back, time to look ahead.  What will our summer gardens have for us this year?  

Kelley's Garden Review...Tomatoes


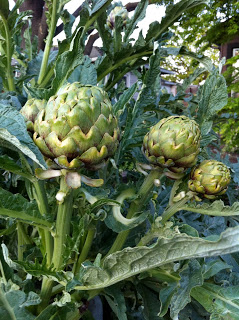
2011 tomatoes, well, let’s face it.  What crap.  Relatively speaking.  The year of the late, bland, largely forgettable fruit.  And, when is tomato season?  July?  No.  August?  No.  September?  Kind of.  October…REALLY?   They weren’t all disappointing, in fact many of the cherries did just fine.  I’m just not fanatical about about cherry tomatoes.  I like tomatoes to slice.  I like texture and color and the amazing varied flavors.  Most just didn’t reach their potential.  Having said that, they ALL taste better than any factory tomato out of a supermarket, so I’ll stop..er…slow down the complaining. 

I planted tomatoes in May, some in my front garden in raised beds, and some in the backyard in a freshly double dug bed.  The night temps were thinking about staying in the 50’s, and they days were pleasant.  I planted on a nice warm sunny day…and the next day our first heat wave hit,  followed by a 25 degree temp drop, then another temp spike, and then the cold and the rains.

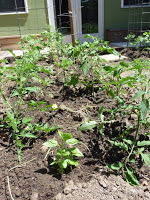
I grew 13 of our tomato varieties in my garden, Arti grew 18 or so in hers.  Here’s the highlights and lowlights of mine.

The Good…

Aunt Ruby’s German Green:  I love this tomato.  I thought there was no way it would perform this year and I was dead wrong.  My best beefsteak this year.  Beautiful, subtle flavors, lightly sweet, and great texture.  I can drool just thinking about it.

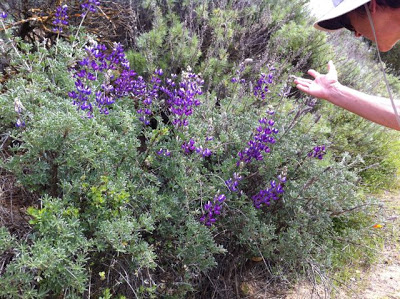
Wild  Galapagos:  I can only wonder what a normal summer would do for this one.  This was one happy, prolific plant!  I made the mistake of using one of my shorter cages for it.  Not only did it outgrow the 5’ cage in no time, I couldn’t keep it inside the cage either.  It laughed at pruning and suckering was pointless.  I looked away for a moment and it grew into 3 nearby cages.  It fruited early and continued to push out gazillions of lovely, tasty cherry tomatoes.  I thought about Galapagos tortoises snacking away while I did the same.  It became my favorite cherry of the year, not as citrusy as Blondkopfchen, not as sweet as Gajo de Melon, just a nice balance of flavors.

Gajo de Melon:  Mine was polite.  I asked it to keep it’s arms and legs inside the cage and it did.  It produced lots of sweet, sweet cherries.  As sweet as Sungold but with better tomato flavors.  It was a bit thick skinned though.

Cuostralee:  I think this one will be a real winner in years that include a summer.  I got loads of big red, juicy fruit.  Some developed very good flavor, some just okay.  I’m eager to try this one again.  I think it will rival the Sudduth Brandywine for flavor and maybe out-produce it.

The Not Quite So Good…

Orange Russian and Ananas Noir:  These guys really wanted to be stars.  While other varieties napped and said “wake me up when summer gets here,” these guys worked hard.  They produced nice quantities of beautiful looking fruit.  They couldn’t quite produce the flavor to match, but I’m convinced they could reach star status with better conditions.

Caspian Pink:  The great procrastinator.  I have to say, this one didn’t get a fair shake.  I planted it in a marginal area under the drip line of an Atlas Cedar.  Strike one.  It got less sun than a tomato plant wants.  Strike two.  It’s a late season tomato, and “late” in this case meant November and December.  It was utterly entertaining to watch it kick into high gear in late November, when the days were so short and winter looming. It was kicking some serious ass in December. The flavor wasn’t bad for a December tomato. I’m giving it 3 of 5 stars for the impressive last ditch effort.

Red Fig:  I dried these this year, and love them.  The flavor is tomatoey (that's a word, right?) with a hint of sweet and no bitterness.  I dry farmed this one and it flourished.  It got zero irrigation from me, and the head scratcher here is the fact that the fruit swelled with water, presumably from the late rains, but continued to produce that way all season. I gave up on it as a fresh snacking tomato because of that.  It was just too watery and bland for me this year.  

The Ugly…

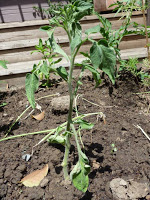
Stupice:  The bomb proof–early–prolific–laugh at the first frost–ripe tomatoes for Christmas dinner wonder.  Anyone with a black thumb can grow this one.  Except for me this year.  I planted it in my freshly double dug bed.  It went Frankenstein.  After the June rains, it stopped growing, except for the existing leaves, which grew to enormous proportions, became thick and distorted but stayed a healthy deep green.  The top growth curled up, and there the whole plant stayed, just that way, no blossoms, no new growth, no yellowing, like it was frozen in time, until late July.  Frankenstein with a Shirley Temple hairdo.  By then I had given up on it as a producing plant, and just stared at it a lot.  Finally it started pushing out some new growth, and a few blossoms appeared.  The new growth started to curl, but not so badly, more blossoms appeared, and then new normal growth, and more blossoms.  I got my first fruit in late August.  Two years ago I had ripe fruit from the first week of June to New Years day.   To it’s credit, the fruit was consistently good once I got it.  I’ll grow it every year.

I struggled with blossom end rot this year, mostly on sweet peppers, and some tomatoes, most notably the San Marzano.  It came and went and came again, I adjusted my watering and tried some amendments to encourage calcium uptake, but I don't think I made a difference.

That, believe it or not, was the short winded version of my tomato adventure.  Next up, the rest of the summer garden.

To be continued…

Promises, Promises and Kelley's Garden Review

Soldier Beetle
What was that promise I made?...To write…regularly…all summer?  Is it really January already?  Did we have summer?  Yeah yeah, that’s my excuse.  Oh well, it’s a new year, I resolve to make better use of my intentions. 

Since there’s a lot of catching up to do, I’ll post it in palatable chunks rather than bore you all (and myself) with one long winded missive…

So, looking back at my gardening year.  Hmmmm, where to begin.  Let me just back up a little farther to start.  I thought our 2010 summer sucked, from a tomato growing perspective anyway. In that year plants struggled through late frosts, grew slowly, and kept wondering where the heat was.  They did grow though, and they did produce.  Not all varieties lived up to their potential, but many produced outstanding fruit and plenty of it!  Some did better for me than years past, like Cherokee Purple.  I had loads of them, and they were just SO good.  Aunt Ruby’s German Green, Gold Medal, and Sudduth Brandywine all knocked my socks off.  I was excited to see what they would do in a “normal” year, and stupidly assumed that 2011 would be just that, or closer at least. 

Sigh. 

My entire garden in 2011 was one interesting or frustrating or head scratching observation after another. It was certainly educating, I learned a lot about humility. In early spring (before planting summer crops), the aphids came as they always do.  They multiplied with lightening speed, and they found my favas, kale, and chard quite to their liking.  They became so thick in places I couldn’t see whole parts of a plant.  I knew their predators were coming, so I was patient, but it took longer than usual.  The weather must have been just warm enough for good aphid breeding but not warm enough to bring on hungry predators.  Finally, I started seeing ladybugs.  They were slow and kind of lazy at first.  I’d go out and assess their feeding and they were not living up to my expectations.  I watched as they casually walked past hundreds of plump aphids. I talked to them, encouraged them to gorge themselves but they were taking their time.  They slowly got up to speed though, started breeding (their larvae eat aphids too), and then the soldier beetles came.  That’s when the balance shifted.  There was frenetic feeding, breeding, and fighting, and shortly the aphid problem was no longer.  Great fun to watch. 

I noticed camel crickets, lots of them, for the first time.  Maybe it’s just the first time I looked closely enough.  They liked my celery a lot, and other cool season crops, although I didn’t notice any terrible destruction, just some minor chewing.  I wonder what eats them.  They eventually disappeared. 

As for the summer crops, growth was just so slow that some plants (especially the peppers) couldn’t outpace the pests.  After planting my raised beds, I discovered that the snail population had exploded, and they, along with pillbugs and earwigs were happy to have the fresh tender salad bar.  I lost several pepper plants, replanted, and lost more.

And then there were the tomatoes...
To be continued

Who stole the summer of 2011?

I think this sleeping carpenter bee had the right idea as far as this summer was concerned. When even the vineyard owners ran for the clippers before last week's rain, and then started to tearfully tell the tale of a difficult harvest, well, we knew we had a lot of company.

We have been talking with commercial and private tomato growers and they mostly have a similar story -- this was a very tricky tomato year. We put our plants in our respective gardens starting in May, and ending in early June. Then, we watched them try to figure out what the heck to do with rains and rapid but short heat spikes in June-uary, followed by weirdly cool weather the rest of the summer. Those weather events also wiped out many early blossoms, contributing to a late harvest.

It's not that we didn't get any fruit -- these big, juicy, Aunt Ruby's German Greens put the lie to that.  But, apart from the ever-faithful and prolific cherry tomatoes, we never saw any fruit to speak of before September; what we did get was not the most exciting flavor bouquet. 

Granted, we are complete perfectionists, so take our hand-wringing in stride.  Plus, some customers told us they were thrilled with their tomatoes.  We grilled these poor people: what did they feed the plants and how often? Where did they grow them (i.e., any microclimate effect)?  How often did they water them?  Did they prune and how?  Etc., etc.

Those interrogations did not turn up any tips for repeatable, wide-spread, successful growing.  However, Kelley will be posting observations about her garden this year which may be useful to you .  In addition, we'd love to hear anything you'd like to share -- feel free to post on our Facebook page.  Let's just help each other.

As they say in sports and gardening: there's always next year.

The End is Near...

No, not the rapture thing, but our plant season is wrapping up.  It's our last sale weekend for the season.  So, in case you're reading this by Memorial day and have some space in the garden that's begging for more, check out our last gasp curbside sale.  Memorial day, 10am-2pm (address listed left of this post).

Then, it's on to my own garden adventures, new things to learn, more curveballs from mother nature, and some choice bleep-worthy words to the weather gods from me.  I'll tell you about it.  Well, maybe without the swearing.

Semi-Tough

Aren't flowers amazing?  For example, feast your eyes on these Pacific Coast irises, grown by a volunteer at the Markham Arboretum.

I thought I'd start off with some eye candy, because, well, we are sold out of several varieties of tomatoes, and getting down to the bone on most of the rest.  We had the best intentions of keeping y'all updated more frequently on our inventory.  But, the dog ate our homework and we just just don't have a better excuse than that.

However, since we are shocked, SHOCKED to find that you are enjoying the blog, let us offer you a treatise on the hot topic of: to pinch or not pinch tomato flowers.

Anti-pinchers, like Farmer Fred, feel that any loss of any blossom is simply an unnecessary loss of fruit.  Pinchers, like yours truly feel that removing early blossoms will help contribute to the plant using its energy to better establish itself, and thus ultimately produce more fruit.  In other words, we are right: pinch, but don't go crazy.

Get Tough

It was wonderful to see family, friends, and repeat customers this weekend.  It makes all the hard work worth it to know that there are excellent people out there who share our values.

For those of you who bought plants this weekend, or intend to soon, we want you to be aware of some tough love that you should consider.

First, our plants were in a greenhouse till you bought them. For best results, they need to be "hardened off" in the 5-10 days before transplanting into your garden.  Hardening off is the process of acclimating plants to outdoor conditions of direct sun, wind, and cooler night-time temps.  This is accomplished by exposing them to an increasing amount of outdoor conditions until they tolerate at least 6 hours of it.  Start by putting them in a sheltered place, and take them inside at night if there is danger of frost.

Second, the minimum soil temperature that tomatoes will tolerate is 50 degrees F; the optimum soil temperature for tomatoes is 70-95 degrees F.  They make soil thermometers, but our tax dollars helped developed data available from the excellent California Irrigation Management Information System (CIMIS).  Average soil temps recorded during 2009-2010 in several representative counties tells it all:

(Soil temperature readings taken 6" deep)
March: 52
April: 57
May: 63
June: 69
July: 74
August: 73
September: 70

You might say, "But I plant my tomatoes all the time in April and get a great crop." True, but you might have gotten an unbelievable crop with more early warmth.  The good news is that it's possible to mimic the process.  In the 19th century, biodynamic gardeners placed these beautiful glass jars, called cloches, over individual plants.  It warms the soil and concentrates the solar radiation on the plant.  You can do the same more cheaply by simply cutting off the bottom of an appropriately sized plastic container (e.g., milk jug).  Alternately, if you have a bunch of clear glass panes, just place them directly on the soil.

Remember, tomatoes are from the tropics, so keep them comfy...

Do you still love us?

I really don't understand how other bloggers do it.  I feel tremendous guilt and shame that it has been months since we last posted.  We have laundry, shopping, and other stuff to do, and I suspect other bloggers just phone all that in.  That is why we are lucky to have the expedient of original artwork from one of our friends/customers.  Yes, Tracy, you will rue the day that you ever met me..

In any case, we are back.  This year we couldn't help ourselves and have more -- volume and variety -- than last year.  We're also deeply gratified that so many people (and not just our relatives) are eager to plant our product again.  But wait, a warning to those who suffered through last year's cold and rainy season.

This may be familiar ground (pun intended), but walking all over your garden, especially when the soil is wet,  is one of the worst things you can do for it.  Why?  Well, plant roots need oxygen and your weight compresses the soil, pounding the oxygen out.  That's why rooting plants in water produces fragile root systems for many types of plants -- there isn't much oxygen in water.   The average human being can compact soil up to 75% by just stepping on it, and you only need 20% more for compaction sufficient to build on!  The lesson here is to establish parts of your garden that will not have plants, and to arrange them well so that you won't pull something reaching for something ill-sited

This is livin', baby

Is there a word for experiencing sensual delight through food, with a dash of self-righteousness thrown in? If so, then I am having it in spades: the crop is finally in full, delicious production, and I am feeling thoroughly justified about growing organic heirloom tomatoes. You haven't lived till you pick your own tomatoes and eat them sun-warmed. They have not lost their flavor due to refrigeration (if you don't already know this, then don't do it), and they are literally at the peak of perfection -- if they had travelled anywhere they'd be V8 juice.

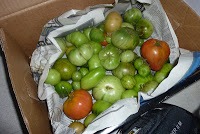
We have some tasting notes below. However, like a proud parent, first I want to show off their school picture. In this picture, starting from top left in the large container are: Paul Robeson, White, Costoluto Genovese, Italian Heirloom, another Paul R., Pineapple, Amana Orange, Gold Medal, and Brandywine Pink. In the small basket are: Blondkopfchen, Red Fig, and peppers -- Fish, Black Hungarians, Cyklon, and an Ancho.

Selected Tasting Notes
  • The black tomatoes continue to astound with their deep, slightly smoky flavor. We have been rocking the Paul Robeson and Cherokee Purple, but sold all of our Black Krim before we snagged one for ourselves.
  • Gold Medal is a knockout: meaty (i.e., few seeds), low acid, slightly sweet, and a visual treat decked out in its yellow and red color combo.
  • Amana Orange split our ticket: Kelley doesn't think the flavor is very interesting, but I find it is a gentle, lower-acid variety that is excellent in sandwiches.
  • White has a lovely, subtle, almost fragrant flavor.
  • All of the cherry tomatoes are scrumptious, but in their own way: Blondkopfchen is juicy and tangy, Red Fig is milder and sweeter, and Black Cherry is complex and well-balanced.
  • Costoluto Genovese is classic. It has a firm, full, tomato taste with a hint of fragrant spice, maybe cinnamon or nutmeg. 
    Brandywine Pink was a wonderful surprise after a childhood of grocery store versions. This one has a rich, bright taste, and the pinkiness glows on the plate.
As you know, this was an uncharacteristically cool California summer. We are getting a very generous crop now, but many of the vines should have been fruiting in early July; we did not get our first full-sugared tomatoes till almost August. However, we still learned a lot, so next post will contain Growing Notes. I promise not to wait another 3 months...

Planting Q&A with Kelley and Arti

While you all have been busy gardening since our last posting, we've been away catching up on our separate interests. That included a tour of Eastern Sierra/Great Basin native plants (e.g., native claret cup cactus at right).

However, despite the vacations, Kelley still managed to amend her good ol' Contra Costa clay just in time for planting by June 1. It was sort of an homage to that classic "Faster, Kelley! Dig! Dig!". Arti "interviewed" her and she has this advice to share:

Arti's Question: You have a backyard that had grass and other stuff growing on it at one time -- why did you amend the soil before planting?
Kelley's Answer: There are 2 main reasons I had to amend my soil.

First, the grass that was once there is long gone, especially since we ran over it repeatedly with heavy equipment when we remodeled the house. That said, the type of suburban grass that was most likely there has shallow roots. Therefore, it never needed to reach deep into the native clay. The tomatoes and other plants I've put in have deeper roots.

The clay is basically impenetrable -- heavy, gluey glop in winter, and brick-hard in summer. Remember what all those Spanish missions were made of? So, my soil had to be loosened up and material added to keep it from returning to its original dense, airless state. This picture sums it up: look at the flat, packed and cracked character of the unamended part of my yard.

Second, a simple soil-testing kits from the hardware store revealed that the soil was an empty plate. Now, there may have been some nutrients in it, but they were "locked up". This means that nutrients may be present, but the plant does not have the chemical or mechanical processes to use it. For example, this winter we had a good amount of rain, which contains lots of nitrogen that plants love.

However, that nitrogen is in an organic form that plants cannot use. Bacteria found in soils convert organic forms of nitrogen to inorganic forms that the plant can use. Nitrogen is taken up by plant roots and combined into organic substances in the plant, such as enzymes, proteins and chlorophyll. Thus, regardless of whether there might have been any nutrients in the soil, it was essentially an empty plate for the plants.

To fix this problem, I double dug several planting beds and added the following for every square yard of clay that was dug up:

- 70% Compost, for general enrichment, aeration
- 10% Bone meal, as a phosphorus boost for fruit production
- 10% Kelp meal, for potassium and trace minerals
- 10% Worm castings, for enrichment

Q: After amending the soil, did you just plop the plants in?
A: Tomatoes being the heavy feeders they are, I added more goodies to the holes in each new fluffy bed (see right) to increase the possibilities for a succesful crop. To each 12" deep hole I added:

- 1 fishead for a calcium boost, which guards against blossom end rot. I got mine at Ranch 99 for $.79/lb, but any Asian-style market is likely to have them;
- 3-4 crushed eggshells, also for calcium, that I saved over the winter;
- 1 handful of bone meal (from Navlet's) which is rich in phosphorus and critical to fruit production;
- 1 modest handful of worm castings, also from Navlet's, for a delicious first feed;
- the recommended dose of mycorrhizae from Bountiful Gardens, where you can read about the amazing things this product does.

Then, after the plant was lowered into the hole and the soil carefully, gently backfilled, I topped it off with nice drink of Dr. Earth's 5-7-4 plant food.

Q: Any other interesting things you found out in the process?
A: Yes, WAY!

Remember how we always say to rotate tomato crops? Well, when I dug up last year's bed, I found several fat, gross hornworm pupae, just waiting to emerge into their adult stage as a hawk/hummingbird moth. Sure am glad I did not use that bed again!

I also discovered that my yard is not all the same clay, nor even all clay. I found brown, red, green, and black clay...not sure what it means, but food for thought. Then, in a thin band around the inside of my fence, I found nice soil with perlite in it and all. This was obviously the remnant of what were perimeter plantings when this was a traditional suburban lawn.


Finally, I noticed that one of our tomato varieties, the White, likes to pretend it has leaf curl -- see this picture at right. So, if you are one of our customers who bought this variety, do not panic.

Planting for high density living

We're in a little bit of withdrawal, as we just did our final Farmer's Market last weekend. We may do some winter crops, but otherwise, we'll start the cycle again next year. That ought to give us time to mend various pulled muscles, bruises, and assorted other physical insults one of us has logged. However, we are keeping up this blog in the meantime with updates about our own planting, as well as that of some of our customers. We want to emphasize that anyone, with even the barest amount of space, can grow their own.

For example, one of our clever customers is growing them indoors. As you can see from the picture on the right, Maria simply lined up the tomato plants (on the sill in black pots) and let them climb up/be supported through the horizontal black shelving. This window is a solarium, so the plants get light from three directions. You can just see the developing fruits -- at 11 on the clock face angle from the light colored pot with the Asian motif. The picture below shows the baby fruit in close up.

In addition, Maria hand-pollinated the flowers -- it took maybe 2-3 minutes! She just tickled the stamens, i.e. the pollen-bearing structures, which are inside the flower petals. Then, she moved to another flower and repeated till she had touched all the flowers. Her actions substitute for the bees who usually do the pollination and without which there is no fruit.

For you Topsy-Turvy fans, see this article in the New York Times about growing upside down. As the article implies, there are lots of ways to grow the tomatoes upside down.
As for us, Kelley has dug out her backyard and planted all the varieties of tomatoes. This is just as it sounds, and we'll describe the process -- with pictures -- in the next post.

Torquemada v2.0 - Pruning and Staking

This winter, Arti returned to visit Spain. That country of savvy eaters introduced the tomato to Europe. However, the tomato is as American (as in continent) as the Aztecs who gave us its name. Given that, we feel some sense of ownership and want to share our ideas on pruning and staking (get it? Inquisition?).

Before going into into particulars, a quick review of why it matters to keep a tomato plant upright and properly pruned:
  • Disease control - Plants with leaves that are upright and uncrowded dry off faster. This decreases leaf damage, fruit rot, and contact with soil pathogens.
  • Fruit production - Leaves need sun to produce the sugar that feeds the fruit (which my father bought for 2 zuzim...). So a properly staked and pruned plant will maximize sun exposure: leaves are not left to be slowly mashed into the soil, or to grow numerous enough to shade each other.
  • Plant productivity - By managing the number of growing stems, the plant will continue to send its valuable sugar to producing fruit, not more stems.
Pruning - All of our heirloom tomatoes are indeterminate. Therefore, the primary pruning objective is to restrain willy-nilly stem production. The optimal plant has evenly distributed stems of approximately similar thickness. This happens by managing sucker growth. Either snip off the sucker at its base or remove the top part, leaving the last 2 leaves. The second method is what you'll have to resort to if sucker growth gets out of hand, and it will not stop additional suckers from forming.

Suckers emerge from the "V" formed by the main stem and the leaf. They will produce flowers and fruit just like the main stem and start to occur from the bottom up. They will impact the strength of the main stem, and suck energy from the rest of the plant. We are still experimenting, but one method suggested by The Urban Farmers is to remove all suckers from below the first fruit cluster:

"Indeterminate tomatoes can have from one to many stems, although four is the most I'd recommend. The fewer the stems, the fewer but larger the fruits, and the less room the plant needs in the garden. For a multistemmed plant, let a second stem grow from the first node above the first fruit. Allow a third stem to develop from the second node above the first set fruit, and so forth."

Staking - Supports help tomato plants grow upright (see reasons mentioned above) and to hold up growing fruit clusters. The best material for ties is pantyhose; Arti is donating her leftovers from her corporate life; you can use anything similar that is soft, but preferably "green". There are basically 2 devices to use for supports:
  • Cages - Kelley has had close encounters with retailed tomato cages. It seems that as soon as her back was turned, the plants heaved their cages across the yard with a "is that all you got?" attitude. Therefore, cages are not being used this year.
  • Stakes - Get a non-chemically-treated, 6-foot, 1x1 diameter, wooden stake with a pointed end for each plant. Remember to buy sustainable harvest, please. Drive the stake at least a foot into the ground within a week of planting to avoid disturbing the roots. Gently tie the rising stem to it at fruit clusters or a bit above points where the stem looks likely/ready to topple.

BTW, we are approaching the end of our tomato plant crop (see left-hand frame). However, we have lots of gorgeous peppers, and will be adding planting, maintenance and recipe information on them very soon. Just as soon as it stops raining...

...and now a word from our sponsors

We are putting in a pitch here for you to include some native plants near your tomatoes. By doing so, you will achieve several objectives.

First, tomatoes need pollinators. By making your garden plot attractive to them, you can up your tomato success ratio with natives that can flower all through the growing season and beyond. And, CA natives can subsist on very little water, happily using the leftovers from what your plants don't use. Second, planting natives makes a pretty garden -- a very practical concern when living in urban/suburban areas with neighbors who frequently want pretty. Third, planting natives is a wonderful, cheap way to "tithe" to the environment, and a healthy environment goes along with healthy eating.

One of us created the garden in the picture, which was a neglected, ice plant-choked patch in a town-house complex in Pleasant Hill. It is now filled with California natives, plus some non-invasive drought-tolerant plants from other parts of the world. (The homeowner's association would not allow edible plants). It took 2.5 years for it to get this way. Starting from the top left of the picture, the CA natives are: California fushcia (Zauschneria sp.), foothill penstemon (Penstemmon heterophyllus), deer grass (Muhlenbergia rigens), coyote bush (Baccharis pilularis), and Idaho fescue (Festuca idahoensis). There is a young Howard McMinn manzanita (Arctostaphylos "Howard McMinn") barely visible, just in front of the gallardia and lavendar.

This is a simple example of what you can do -- for your tomatoes, for your environment, and ultimately for you.